The iPhone contains a built-in Voice Memos app that lets you capture your audio and save it to your storage. The audio might be an interview or even a class course; the options are endless. While some devices control the duration of these recordings, others let you hit the 'Record' button until your device runs out of memory.
In addition to recording the audio, you can also edit, label, and share with others through emails and various messaging apps.
To capture the audio, the app uses the iPhone's built-in mic. However, if a user needs a boost, they can acquire an external mic. And if you don't already have the app, you can install it from the App Store.
This is how users can record Voice Memos on their iPhones.
Recording
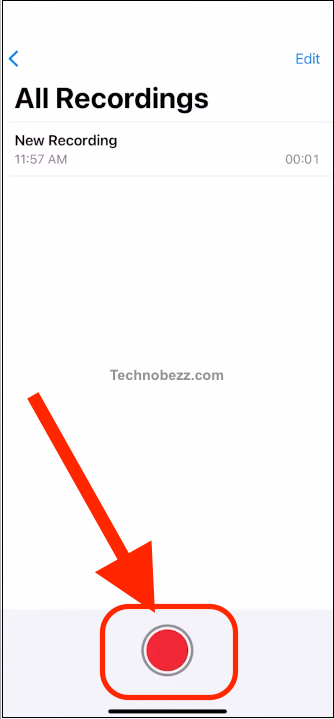
- On your iPhone's Home screen, open the Voice Memos application. Alternatively, you can request Siri to open it for you.
- Once you're ready to start recording, press the record button indicated by a big red circle.
- If you wish to pause, click on the white button above the record button, which will uncover the pause button. Click on it.
- Once you have pressed "Pause," the button will read "Resume," which you can press to continue recording.
- When you are finished, tap the red square button.
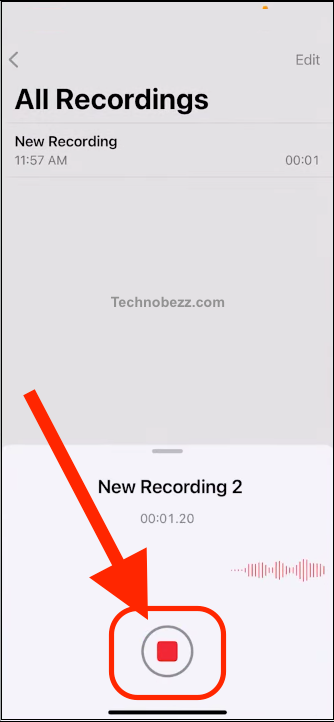
The audio clip will automatically be saved to your iPhone. Through iCloud, your saved voice memos will be accessible through all your supported gadgets.
Editing
Once you're finished recording, you can easily replace some parts of the clip, trim, or even eliminate the unwanted parts.
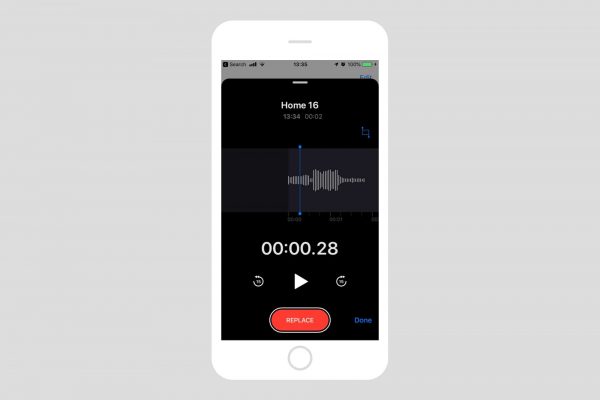
Replacing:
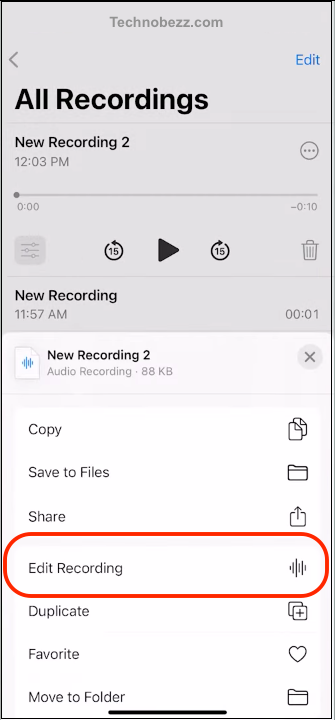
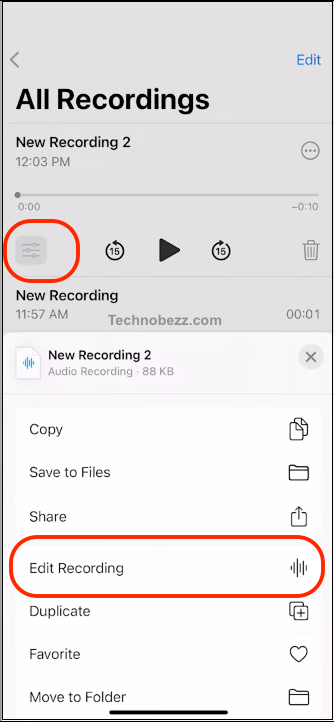
- Select the Voice Memo that you want to edit. Tap the Edit on the top-right corner and then select "Edit Recording."
- Using your finger, move the waveform to either side until the blue playhead is placed at the start of the part you want to redo.
- Now tap "Replace" to re-record the current memo.
- Press the 'Pause' button when you're done recording.
- Now tap 'Done' to save the project.
Trimming:
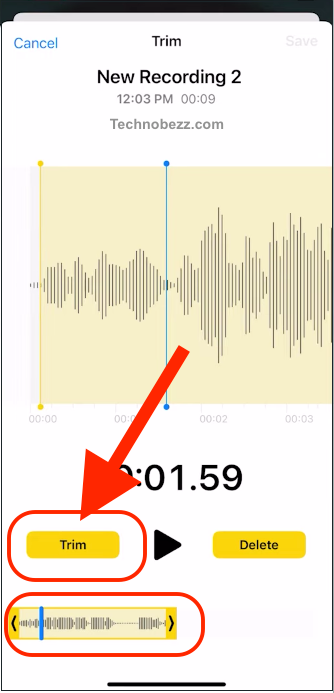
If the audio clip is too long, you can trim parts to get it to your desired duration.
- Open the Voice Memos app by tapping the icon or by using Siri.
- Click on the three dots (…) located on the left of your desired voice memo.
- Click the 'Edit Recording' button. Once you do that, the yellow handles will be visible on either end of the audio file.
- Now select the 'Trim' button.
- Pulling the yellow handle towards the right can trim from one end. You can also pull the yellow handle at the beginning towards the left.
- Finally, click "Save" and then "Done."
Deleting:
You can select various parts from your memo to be deleted.
- Launch the Voice Memos app on your iPhone.
- Tap on the (…) on the left of your targeted memo.
- Select the "Edit" button on the top right side. You'll then see yellow handles on either end of the audio file.
- Using your fingers, carefully pull the handles from either side until they cover the part that you want to be deleted.
- Tap 'Delete.'
- Now click "Save" and then "Done."
Renaming:
- Go into the Voice Memos app on your iPhone.
- Identify your memo and select its current name.
- Now type in the new name.
Sharing your memo
Suppose you want to share the memo with someone else; here's how you can send it.
- Go into your Voice Memos app on your iPhone.
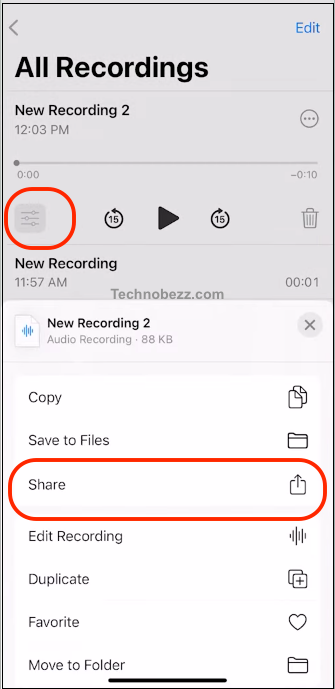
- Click on the (…) located on the left of the memo you want to share.
- Click on 'Share.'
- Then choose the mode in which you wish to share the file.
With this app, a user does not need to purchase a device catered explicitly for audio recordings like the traditional tape recorder. This app is multi-functional in that several steps can be taken to improve it before it is released into the world.