A turntable is a platform that rotates the phonographic record and transforms the carved codes of music into electrical signals. These signals are then further converted into the sound medium through an external conversion device such as an electronic amplifier along with speakers, which are not part of the turntable. But before being fed into the amplifier, these signals must first be prepared by the preamp. This completes the conversion process and you can finally hear the sound of music from the device. A needle called ‘stylus’ makes contact with the record and the speed selector decides the rotation speed mainly measured in RPMs. If you don’t know yet how to set up turntable, follow the steps below. This sequence of steps will allow for a detailed set up of a turntable.
See also: How to make phone calls with Alexa
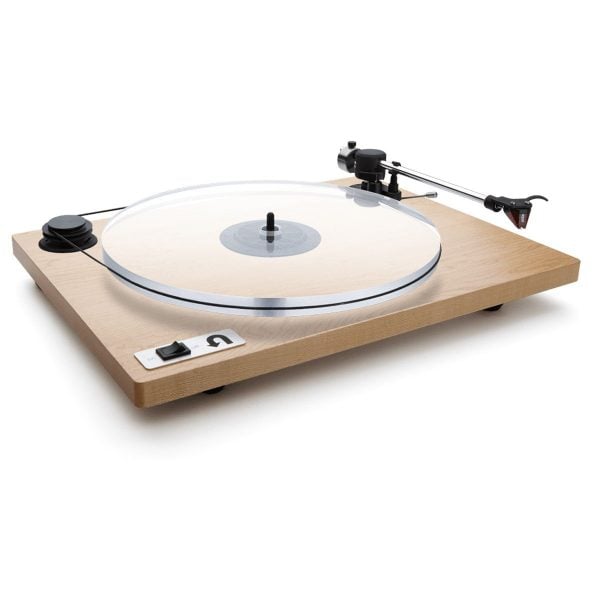
How to set up turntable
Leveling
The first and foremost thing to know is that it is a very sensitive device with microscopic processes going on inside it. So, the first thing you need to do is to put your turntable on something very rigid and strong.
Secondly, make sure that it is horizontally leveled. This can be done by a level instrument. If your record already has leveling feet, then use them. Otherwise make the surface on which it is placed, a perfectly leveled one. And since there are four feet of the device, it is recommended that you check the level from every one of the four sides, and most importantly from the center to the stylist.
Stylist setup
The next thing is to set up the stylist pressure. This means that you have to calibrate the amount of pressure the needle will exert on the record grooves. This is done by the screwed calibrator at the end of the tonearm and has calibration measurements on it. At first, rotate the calibrator from the farther end just enough that the tonearm is leveled straight. When this is done, rotate the front end where the measurements are carved. The value to which this needs to be turned is the same as the weight of the cartridge.
Anti-skating setup
The next step is to set the anti-skating value. Actually, what happens is that the turn arm acquires a tendency to get pulled towards the center while the record is spinning. So there is a mechanism designed to counteract this pull called the anti-skating mechanism. It has a knob with measurements on it, near the rear end of the turn arm. The general rule for this setup is to set the same value for it as for the cartridge weight. However, this is not a hard and fast rule. If this method does not give a good quality sound, then you need to use a hit-and-trial method and rely on your hearing to adjust for the best sound quality by changing it by small amounts and checking for quality.
Cartridge alignment
The final, most important step, is the setting up of the cartridge. Make sure the wiring is correct and all the wires go into their designated slots of positive/negative and left/right. After this is done, you have to tighten the two screws on the headshell just enough so that the cartridge is perfectly aligned with the record. Do not tighten up the screws all the way. The aligning is done using a protractor which is basically a set of measured lines in the form of a specific pattern. You can print out this pattern onto a paper piece while taking in account the correct size of the print. Place one end of the protractor and pin it to the centerpiece of the system in such a way that the paper is free to rotate. Now connect the protractor onto the turn arm and place it on the protractor. It must be in line with the mainline drawn on the protractor at both patterns. If it is offset on any one of the patterns, then readjust the screws and check again. Keep doing it until both patterns have the cartridge in line.
Now you are all set up for playing your music on the turntable.